A Step-by-Step Guide for React Native Developers
Transitioning from React to React Native: A Developer's Guide
Becoming a React developer is not a big challenge these days because roadmaps and tutorials are available everywhere to guide us through the journey. But today, we’re going to focus on becoming a React Native developer.
Let’s break down what React Native is, why we use it, and the problems it solves.
What is React Native?
React Native is a framework that allows you to build mobile applications using JavaScript and React. Instead of creating separate codebases for iOS and Android, you can use React Native to write a single codebase that works on both platforms.
Why do we use it?
It makes mobile app development faster and more efficient. You don’t need to learn platform-specific languages like Swift for iOS or Kotlin for Android—React Native uses familiar web development concepts, making it easier for React developers to transition into mobile development.
What problems does it solve?
React Native simplifies cross-platform development by:
Eliminating the need for two separate codebases.
Saving time and resources by reusing most of your code across iOS and Android.
Allowing developers to create apps with a native-like look and feel without diving deep into native programming.
In short, it bridges the gap between web and mobile development, making it easier to build mobile apps efficiently!
In this tutorial, we’ll give you an initial push to help you get started as a React Native developer and run your first project successfully.
Let’s try to understand React Native from a web vs mobile perspective to help you grasp how things work differently in each environment.
For instance, when you create your first JSX element on the web, it might look like a simple <div> with some text, like this:
import React from 'react';

const Home = () => {
    return (
        <div>
            Hello
        </div>
    );
};

export default Home;
This is standard JSX code that we commonly write in our daily coding routines. But now, let’s try to understand how we can write this same code in React Native. How would it look and work differently?
import { View, Text } from 'react-native';

const Home = () => {
    return (
        <View>
            <Text>Hello</Text>
        </View>
    );
};

export default Home;
This is a React Native component. Here, instead of using a <div>, we use a <View> to structure our layout, and the text is wrapped inside a <Text> component.
In React Native, we use <View> instead of <div>, and all text must be placed inside a <Text> component. Without the <Text> component, you won’t be able to display any text in React Native.
I hope you’re feeling more confident now—it’s very similar to React code, isn’t it? But keep in mind, this is just the beginning! There’s much more to learn, but for now, you've got an idea of how things look. 😊
Now, let’s move on and understand how we can set up a React Native codebase.
Okay, if you Google "How to set up a React Native app?" you will most likely come across two options:
Expo (React Native Framework)
React Native CLI
Both are valid ways to set up a React Native app, but the most recommended option is Expo. Expo simplifies the development process by handling many of the complexities for you, giving you a smoother experience when working on your first project.
Now, you might be wondering, "What’s the difference between Expo and React Native CLI?" This is an important question, and we’ll discuss it so you can understand the pros and cons of each before starting your project.
Expo vs React naative CLI
| Feature | Expo | React Native CLI |
| Ease of Use | Very easy; ideal for beginners | Requires more setup; better for experienced developers |
| Custom Native Code | Limited; must use Expo SDK or eject | Full access; can write any native module |
| Development Speed | Fast setup and iteration | Slower due to manual configurations |
| App Size | Larger initial size due to bundled libraries | Smaller if only essential libraries are used |
| Community & Libraries | Growing library support but some limitations | Extensive community support with many third-party libraries |
From the table above, you can see that Expo works really well for small to medium-sized projects, especially when you don't need a lot of customizations. That said, the choice between Expo and React Native CLI really depends on your project's complexity. If your project is simple, Expo is a great choice. Even the React Native documentation recommends Expo because it offers a smooth and hassle-free experience.
For this tutorial, we'll stick with Expo. Later on, we’ll explore how to create a project using the bare React Native CLI. Trust me, once you’ve got the hang of things, switching to the CLI won’t be a big challenge for you!
Create your first app with the Expo
Here you'll get a clear idea of what prerequisites you need before starting your React Native project. Just take a moment to check it out and ensure everything is properly installed on your computer.
We'll use create-expo-app to initialize a new Expo app. It is a command line tool to create a new React Native project. Run the following command in your terminal:
# Create a project name with StickerSmash
npx create-expo-app@latest StickerSmash

# Navigate to the project directory
cd StickerSmash
In the project directory, run the following command to start the development server from the terminal:
npx expo start
After running the above command:
The development server will start, and you'll see a QR code inside the terminal window.
Scan that QR code to open the app on the device. On Android, use the Expo Go > Scan QR code option. On iOS, use the default camera app.
To run the web app, press w in the terminal. It will open the web app in the default web browser.
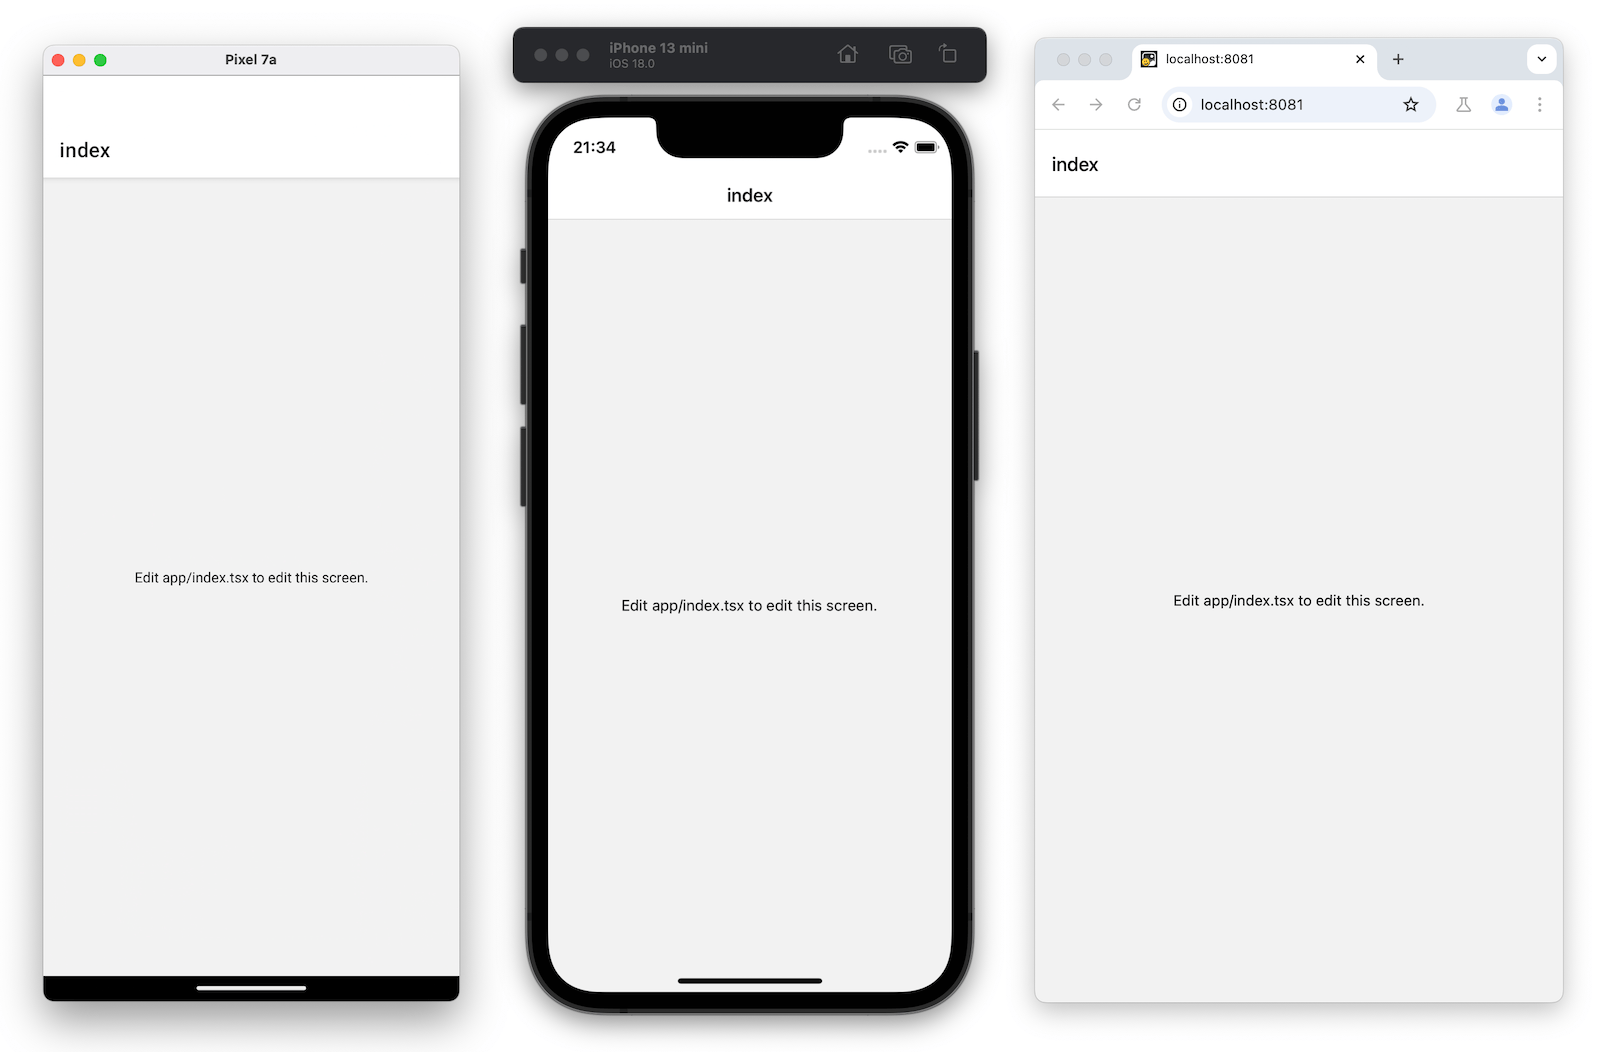
Once it is running on all platforms, the app should look like this:

How cool and easy is that? You're running an Android or iOS app right on your phone, thanks to the magic of the Expo Go app. This is where Expo really shines, making the whole process super smooth and effortless!
The app/index.tsx file is where the text displayed on the app's screen is defined. It's the starting point of our app and runs as soon as the development server starts. It uses core React Native components like <View> and <Text> to set up the layout and display content.
Styling in React Native is done using JavaScript objects instead of CSS, like on the web. But don't worry—if you're familiar with CSS, many properties will feel very similar! Most React Native components have a style prop that accepts a JavaScript object for styling. You can find more details in the React Native documentation on styling.
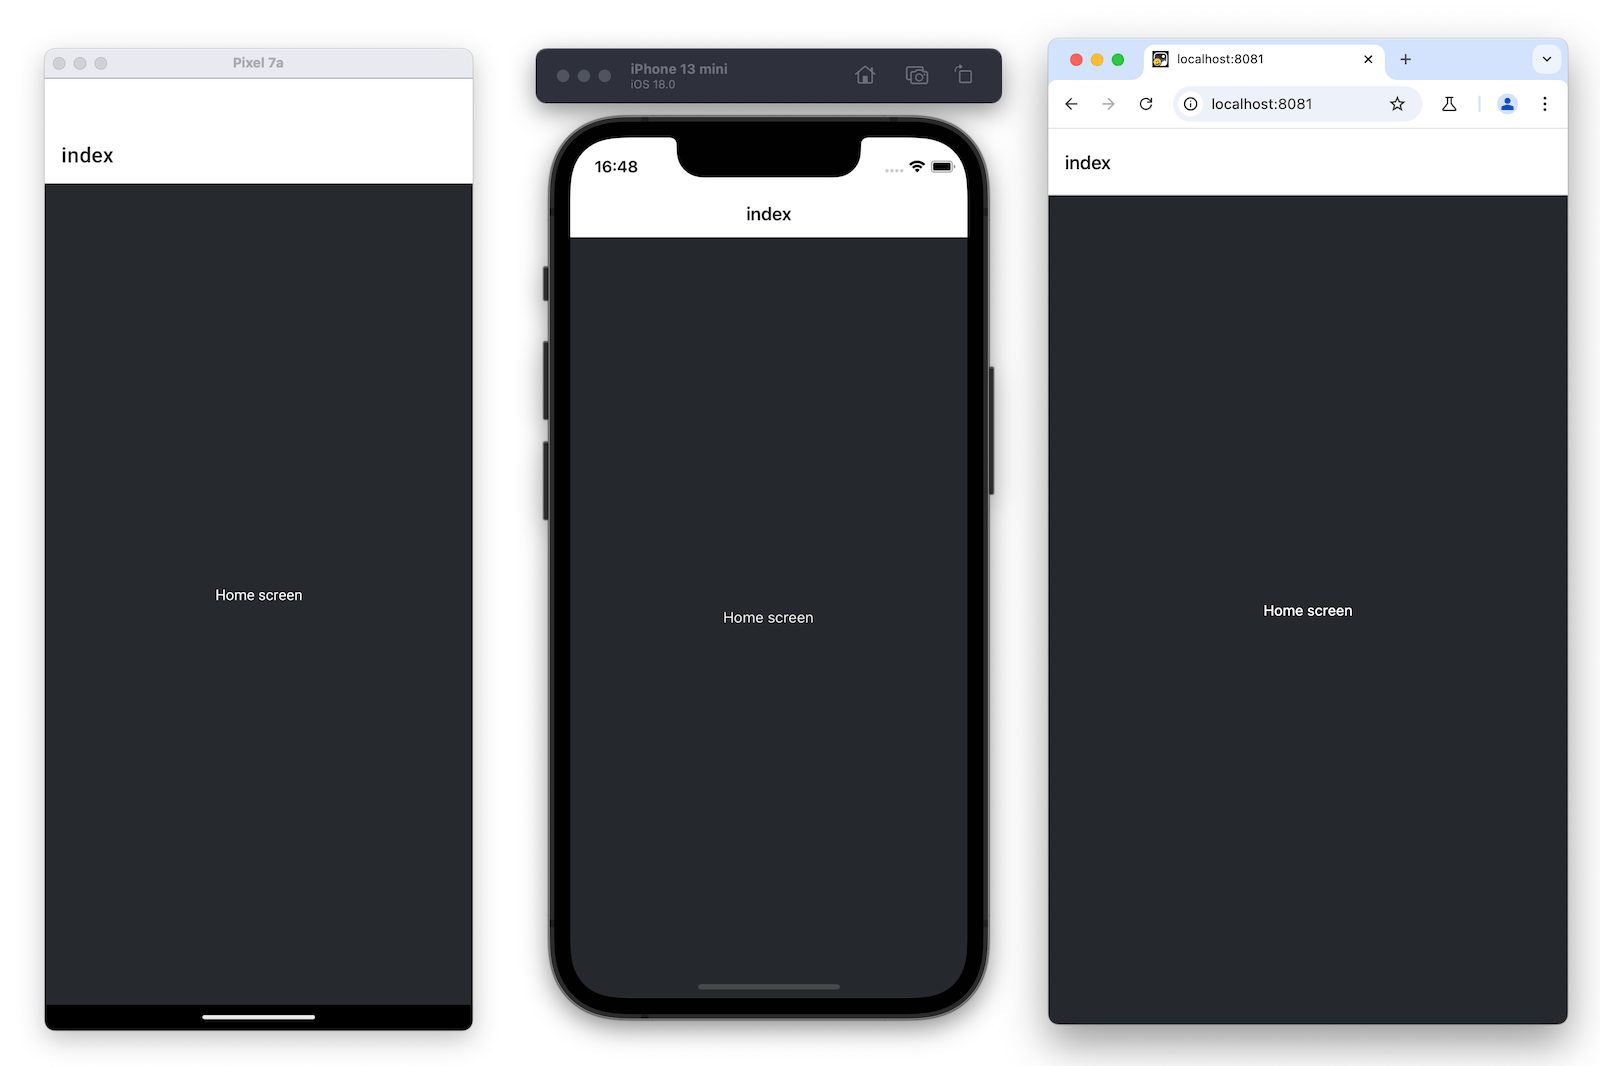
Now, let’s make some changes to the app/index.tsx screen:
Import StyleSheet from
react-nativeand create astylesobject to define custom styles.Add a
styles.container.backgroundColorproperty to<View>with the value#25292eto change the background color.Replace the default value in
<Text>with"Home screen".Add a
styles.text.colorproperty to<Text>with the value#fff(white) to update the text color.
With these changes, your app will have a new look!

Isn’t it amazing? First, we learned a bit about React Native. Then, we explored how to set up a React Native project. After that, we dived into Expo, created a project using it, and even edited our very first app by giving it a fresh design.
Now, here’s a question for you: Doesn’t it feel similar to writing React code for the web? I hope you’re starting to feel more confident about how things work. And if this is your very first React Native app, you should be super proud of yourself. 😁
This is just the beginning! We’ve learned how to create our first app, but there’s so much more to explore. The journey has just started, and there’s a lot of exciting stuff ahead. Here are a few topics you can dive into on your own, or I’ll be creating articles about them in the coming days. Practicing these will definitely boost your confidence:
Navigation APIs
LocalStorage
Redux Toolkit
Image Picker
Date Picker
Permissions
Push Notifications
Responsive UI
Video and Audio Libraries
Animations (Reanimated)
Social Login Screen
Protected Auth UI / Public UI
Deployment
Take it one step at a time, and you’ll master these concepts in no time! 🚀
We at CreoWis believe in sharing knowledge publicly to help the developer community grow. Let’s collaborate, ideate, and craft passion to deliver awe-inspiring product experiences to the world.
Let's connect:
This article is crafted by Syket Bhattachergee, a passionate developer at CreoWis. You can reach out to him on X/Twitter, LinkedIn, and follow his work on the GitHub.